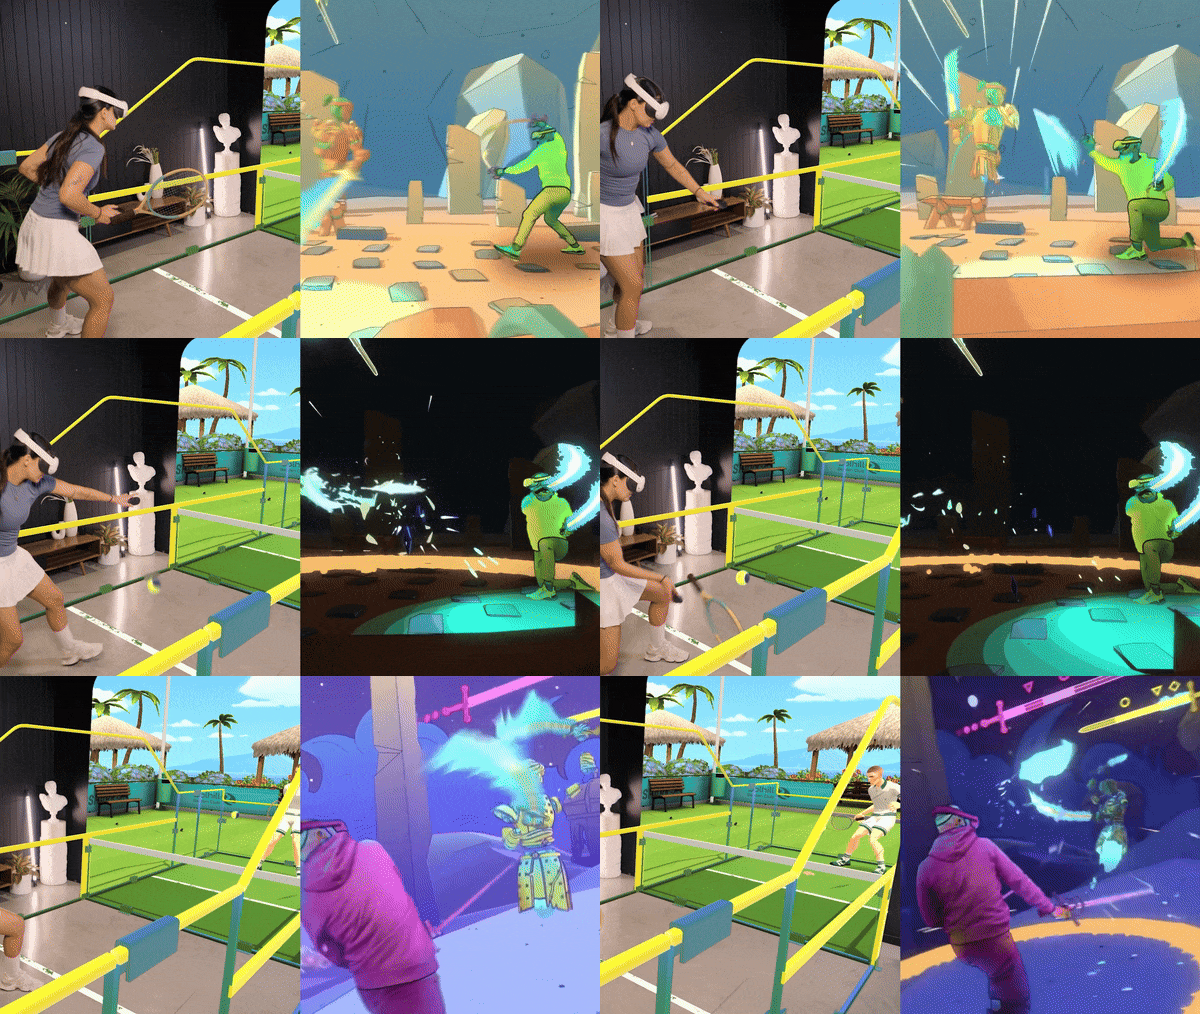
What is LIV?

A company of gamers, creators, and all-round great humans; all passionate about building solutions for sharing VR.

LIV enables the capturing & sharing of your favorite VR gaming moments with your friends, family, and fans. The LIV app and SDK allows content creators to record Mixed Reality, Avatar, or In-game cinematics with any of the supported games.

LIV now supports Meta Quest Presence Platform capabilities! Whether that be passthrough, hand tracking, scene recognition, and anchors, your player’s experience can be authentically recorded to best showcase your Immersive or Mixed Reality app.

With LIV for Immersive Apps, you can put yourself inside a VR game using just a camera or webcam and a green screen. Create content that showcases your physical presence within the virtual world. LIV handles everything from calibration to final output, giving you the power to create stunning content.

With LIV for Mixed Reality Apps, you can film someone playing a VR game in their real-world environment, such as their living room or home, and composite that footage with the virtual elements of the game. Create a unique and engaging video that blends the real and virtual worlds seamlessly, helping showcase what your game is all about.

What is the LIV SDK?

The LIV SDK adds support to your game for Mixed Reality Capture and Virtual Cameras.

The LIV SDK is intended for developers to add support to their games. If you are a content creator or someone that wants to use LIV to record content with the supported games, you do not need to install the LIV SDK.

The LIV SDK provides a spectator view of your application. It contextualizes what the user feels & experiences by capturing their body directly inside your world! Thanks to our software, creators can film inside your app and have full control over the camera.

With the power of out-of-engine compositing, a creator can express themselves freely without limits; as a real person or an avatar!

How It Works

The LIV SDK spawns a camera inside your game which is controlled by LIV. This camera then renders your app into a background and foreground, to allow the user’s body to be composited in. The background & foreground are separated by clipping geometry, based on the user’s location within the scene. These textures are then submitted for composition.

The compositor takes in multiple timestamped sources, performs latency compensation, and composites them together. This output can then be recorded or streamed using software like OBS or Discord.

Doing this work out-of-engine comes with some significant benefits:

  • Optimised resource use - we only do the bare minimum work required in the SDK, allowing it to stay lightweight and easy to maintain.
  • Accurate latency compensation works without any additional effort from you, the developer.
  • Additional camera types, effects, and layers can be added in future updates to the LIV App, making your SDK integration last longer.

For this to work well, we have developed a minimum-latency, high-performance transport layer that also handles resource management. LIV’s footprint is almost entirely dependent on how well-optimised your application is!

The LIV App on Steam connects with games that have integrated the LIV SDK to do realtime composition.

What is the LIV App?

The LIV App on Steam is used to capture and composite games that have added the LIV SDK.

LIV on PCVR

You can download the LIV App on Steam for free!

When running VR applications on a PC, LIV works with these runtimes:

  • SteamVR (OpenVR API)
  • OpenXR (When provided by SteamVR)

A SteamVR compatible headsets are supported. Games published on Steam or Viveport with the LIV SDK installed will be automatically detected by LIV.

LIV works with a PC at this time. Standalone devices not connected to a PC do not work.

Overview of adding LIV support to your app

At a high level, there’s 4 steps to releasing your game with LIV support:

  1. Get the latest LIV SDK
  2. Add the LIV SDK to your app
  3. Test the integration
  4. Release your app with LIV

Getting the LIV SDK

The LIV SDKs can be downloaded through our Developer Portal. The process is the same whether you need the Unity or Unreal SDK.

Video thumbnail

  1. Register at dev.liv.tv with your work email

Register

  1. Create your account, using your business contact

Create account

  1. Create your game record with LIV

Create game

  1. Select your game and navigate to Downloads

Downloads

  1. Agree to the Terms of Service & Privacy Policy

  2. Generate your app specific SDK by selecting Prepare. Note, if you create a new game you’ll need a new SDK. Select Prepare

Prepare

  1. Download the SDK and you’re ready to move onto installation

Download

LIV SDK v2.0 for Unity

Our Unity SDK can be downloaded directly through our Developer Portal.

The SDK is used to add support for LIV to your game. If you’re a content creator wanting to capture Mixed Reality or Avatar videos of a supported game, you do not need to download the SDK.

The LIV SDK v2.0 introduces support for Meta Quest Presence Platform, specifically Passthrough, Spatial Anchors, Scene understanding, Hand Tracking, and Interaction SDK. These features will work when running a compatible Quest Game on PC.

You can watch the video tutorial here:

Video thumbnail

Unity Quickstart Guide

  1. Backup your project.

  2. Import the LIV SDK into your project. (Assets > Import > Custom Package)

  3. If Unity prompts you to upgrade deprecated APIs, then say "Yes".

    Import unity package

  4. Add the LIV component anywhere in your project. Either spawn it every scene or use DontDestroyOnLoad.

  5. Assign HMD Camera and Stage properties in the LIV script.

    Assign HMD Camera

  6. If using Universal Render Pipeline, set upgrade package to support URP.

    Click here for the URP Walkthrough

  7. Test your integration works, click here for more info.

Read on for more details and information on customising your integration.

VR Rig Hierarchy

The LIV Unity SDK is interested in only two GameObjects: the HMD Camera and the XR Origin.

The XR Origin object is where LIV's camera will be inserted in your hierarchy.

  • It must be set to the GameObject that contains the player's hands.
  • It must contain the entire player.

HMD Camera

Unity GameObject containing the player's HMD camera

This is the camera responsible for rendering the user’s HMD. The LIV SDK, by default clones this object to match your application’s rendering setup.

XR Origin

Unity GameObject containing the entire player, HMD & hands

This is the topmost transform of your VR rig, it represents the centre of the user’s playspace. Usually this is the parent object to the HMD camera and controllers. When implementing VR locomotion (teleporting, joystick, etc), this is the GameObject that you should move around your scene.

XR Origin Unity Component/Unity VR Template

If you're using the VR template, or a VR Rig that uses the "XR Origin" component from Unity, there's a couple of changes you need to make.

  1. The "Tracking Origin Mode" in the XR Origin component must be set to Not Specified or Default.

Unity GameObject containing the player's HMD camera

  1. Counterintuitively, you should use the "Camera Offset" transform NOT the "XR Origin (XR Rig)" transform. This is due to how an additional camera offset is applied to the rig by the XR Origin component.

Unity GameObject containing the player's HMD camera

Customising Your Integration

Game-Driven Camera for Avatars

Call liv.render.SetPose(position, rotation, vfov) every frame to control LIV's camera when avatars are being used!

Simply stop calling it to return control to the user's own camera.

Exclude MonoBehaviours

This is for removing unwanted scripts from the cloned MR camera when not using a camera prefab.

By default, we remove the AudioListener, Colliders and SteamVR scripts, as these are not necessary for rendering MR!

The excluded string must match the name of the MonoBehaviour.

Provide Your Own Camera Prefab

By default, LIV uses the HMD camera as a reference for the Mixed Reality camera.

It is cloned and set up as a Mixed Reality camera. This approach works for most apps.

However, some apps can experience issues because of custom MonoBehaviours attached to this camera.

You can use a custom camera prefab for those cases.

Spectator & Passthrough Layer Mask

The layer mask properties on the LIV component define which layers will be visible to the LIV camera.

Spectator & Passthrough Layer Mask

By default, the spectator mask is used for the LIV camera. When passthrough mode is enabled on a device, the passthrough mask will be used instead of the spectator mask.

Hiding Avatars/Hands

You should use these masks to hide in-game avatars from the LIV camera, leaving a space for LIV to composite in the user's body or LIV avatar.

Below is a simplified example setup showing how the two masks work with a VR project.

Spectator & Passthrough Layer Mask

Additional Uses
  • Rendering special affects/UI for the LIV camera only. For example a score or healthbar.
  • Hiding HMD-based effects/particles.

Shader Variants

LIV SDK adds MR-specific shader variants. That means that you can write a specific portion of existing shader to be used only for the mixed reality feed.

  • LIV_MR: Render into background and foreground texture
  • LIV_MR_BACKGROUND: Render only in the background texture
  • LIV_MR_FOREGROUND: Render only in foreground texture
#if defined(LIV_MR_BACKGROUND)
  col = fixed4(1, 1, 0, 1);
#elif defined(LIV_MR_FOREGROUND)
  col = fixed4(0, 1, 1, 1);
#else
  col = fixed4(0, 0, 1, 1);
#endif

Rendering Events

See the API reference for a list of Actions on the LIV component that can be used for adding custom behaviour to the LIV SDK.

Fix Post-Effects Alpha Channel

If your game is using any post-effects it is possible that the foreground texture alpha channel is corrupted.

By turning on this feature LIV tries to fix this issue by capturing the alpha channel before any post effects are applied and then simply overwriting the final alpha channel output with the captured one.

For Post-Effect Stack v2

  • On the Post-Process Layer, enable the Keep Alpha option.

Disable Standard Assets

This is a property on the LIV component.

Unity’s standard assets can interfere with the alpha channel that LIV needs to composite MR correctly.

This option disables all standard Unity assets for the Mixed Reality rendering.

Universal Render Pipeline

Setup

Make sure you've already setup the Unity SDK before following these steps:

  1. Navigate to LIVSDKSettings (Usually located at Assets/LIV/Resources/LIVSDKSettings) and click the "Switch To Universal Render Pipeline" button.

    Switch Pipeline

  2. Find File/Build Settings/Player Settings/Other Settings/Scripting Define Symbols and add LIV_UNIVERSAL_RENDER

    Switch Pipeline

Versions Below 2.0

Additionally, for Versions 1.5.1, 1.5.2, 1.5.3 follow the following steps:

  1. Find your Forward Renderer Asset(s) in the Unity project. (Note: There can be multiple renderer assets in your project. Make sure you're doing this for all of the renderer assets that will be used with LIV)
  2. Under Renderer Features, add "SDK Universal Render Feature".
  3. On your LIV component enable “Fix Post-Effects alpha channel”.

High Definition Render Pipeline

Currently unsupported.

Meta Presence Platform Integration (BETA)

Intro

Meta Presence Platform features for Mixed Reality are supported on the Unity LIV SDK from version 2.0+.

Please note that this functionality is currently in beta, and development around issues and features will updated regularly, for more info on specific updates check the changelogs.

Constraints and Limitations

  • Realtime composition is not yet supported. Post-production work will need to be done for background removal of the live camera subject

  • The app must be run on PCVR with the Presence Platform features working

  • Presence Platform requires Oculus set as the active OpenXR Runtime

  • LIV App uses overlays so SteamVR must be running

  • Tracked cameras only works with SteamVR

  • When using both SteamVR and Oculus at the same time, the spaces need to be synced via OpenVR Space Calibrator

  • Quest Scene data must be set prior to connecting to SteamVR. If changes to the Scene are made, you must reconnect to SteamVR

  • DirectX11 is currently supported. DirectX12 and Vulkan are not supported at this time.

Video Tutorial

Watch our tutorial for a step-by-step walkthrough for integrating the Meta Presence Platform.

Video thumbnail

Sample Project

A sample project is available on GitHub with the supported Presence Platform capabilities if you’d like to follow along.

The Meta XR All-in-One SDK (UPM) v65.0 and later is compatible with LIV’s Presence Platform. Earlier Meta SDKs may work but if any issue is encountered, please try upgrading the Meta SDK or reach out to us at support@liv.tv.

Meta Present Platform Passthrough

Passthrough enables a player to see their real world environment while wearing the Quest headset. From a 3rd person capture perspective, the camera will see the player in their real world environment as well as the in-app experience.

Passthrough setup

Setup

  1. First set up the LIV SDK in your project, if you haven't already.

    Click here for our quickstart guide.

    These next steps are specific to Meta Presence Platform integration.

  2. Hide objects that you don’t want to show in Mixed Reality mode.

    In the Mixed Reality mode, you may not want certain objects to be rendered (such as sky boxes, skydomes, background meshes etc) and instead have your real world live environment, such as your actual living room, show through.

    In the Layer management UI, create a layer for these objects you want to hide. Now tag the individual objects to it. You can also do this in script if you want.

    Create passthrough layer Passthrough Layer

    In the LIV component in the scene you can uncheck the Passthrough layer, so objects tagged with that layer are now hidden from the LIV render passes.

    The callbacks onPassthroughActivated and onPassthroughDeactived are also available for further customisation when Passthrough mode is toggled via the LIV App. Set Passthrough Layer Mask

  3. Update tracking ID: Obtain tracking ID using developer portal

    Import unity package

    Add your tracking ID to the tracking ID field in LIVSDKSettings

    Import unity package

    In case of updating LIV SDK locate tracking ID in your version control under file SDKStructs.cs/public const string SDK_ID = "YOUR_TRACKING_IDENTIFIER";

That's it! You should now have Meta Presence Platform passthrough enabled for for your project.

Capturing Meta Presence Platform with LIV (BETA)

Overview

At a high level, the process is as below;

  1. Setup your Space in the Quest OS
  2. Start Meta Quest Link. Doesn’t work with Virtual Desktop or Steam Link.
  3. Ensure Meta Quest Link is set as the active OpenXR runtime.
  4. In the Beta tab, ensure Developer Runtime Features,Pass through over Meta Quest Link, and Spatial Data over Meta Quest Link is enabled.
  5. Start LIV app on Steam.
  6. Start game with LIV 2.0 SDK
  7. Start LIV Mixed Reality Capture and manually select the game
  8. Start SteamVR
  9. Capture

We have a comprehensive step-by-step guide to help you get set up for recording on our helpdesk - click here to view.

Setting up Quest For Presence Platform

  1. Ensure Meta Quest Link is set as the active OpenXR runtime.

    Quest link setup

  2. In the Beta tab, ensure Developer Runtime Features,Pass through over Meta Quest Link, and Spatial Data over Meta Quest Link is enabled.

    Quest link setup

Known Issues

Unity crashes during frame debugging

When LIV is attached to Unity editor and it's in play mode, using frame debugging, exiting play mode suddenly, the next time you connect the LIV SDK to Unity, it will crash. This can be avoided by disabling frame debugging after being done with debugging and unpausing the player to let LIV SDK recover before exiting play mode.

Game isn’t showing up in the LIV App Auto detected games list

LIV app expects your game root folder to have the game files, rather than a folder within a folder. Ie: steamapps\common\[game] rather than steamapps]common\[game]\[game]

Frequently Asked Questions

The LIV avatar's head doesn't move when my game is running

This likely means that your application is running using Oculus, or OpenXR through Oculus. Please make sure you're either using OpenXR through SteamVR, or SteamVR as your runtime.

How do I control the LIV camera?

You can fully control the camera by calling:

liv.render.SetPose(position, rotation, vertical field of view)

The camera is automatically released whenever you stop calling this function.

Note that only LIV avatar cameras are currently controllable, as MR cameras must remain aligned with their physical sensors 😉

I can't see the avatar / player in the LIV output

If your game is using post-processing it is possible that the foreground texture alpha channel is corrupted.

You can fix it by enabling the "Fix Post-Effects alpha channel" toggle on the LIV component. If you're using the Universal Render Pipeline, make sure to follow our steps to have it correctly work.

LIV doesn't activate when I capture a build of my game

Make sure your Unity project is targeting 64bit builds. LIV is only compatible with 64bit applications.

API Reference

LIV.cs

This is the main LIV component.

Properties:

TypeNameAccess
ActiononActivateread/write
ActiononDeactivateread/write
Action<SDKRender>onPreRenderread/write
Action<SDKRender>onPostRenderread/write
Action<SDKRender>onPreRenderForegroundread/write
Action<SDKRender>onPostRenderForegroundread/write
Action<SDKRender>onPreRenderBackgroundread/write
Action<SDKRender>onPostRenderBackgroundread/write
ActiononPassthroughActivatedread/write
ActiononPassthroughDeactivatedread/write
ActiononValidationErrorread/write
Transformstageread/write
Matrix4x4stageLocalToWorldMatrixreadonly
Matrix4x4stageWorldToLocalMatrixreadonly
TransformstageTransformread/write
CameraHMDCameraread/write
CameraMRCameraPrefabread/write
booldisableStandardAssetsread/write
LayerMaskspectatorLayerMaskread/write
LayerMaskpassthroughLayerMaskread/write
string[]excludeBehavioursread/write
boolfixPostEffectsAlpharead/write
boolisActivereadonly
SDKRenderrenderreadonly
stringtrackingIDreadonly

SDKRender.cs

Owner of rendering for the LIV SDK.

Constructors:

TypeNameNote
voidSDKRender(LIV liv)Not for public use.

Properties:

TypeNameAccess
SDKInputFrameinputFramereadonly
CameracameraInstancereadonly
CameracameraReferencereadonly
CamerahmdCamerareadonly
Transformstagereadonly
TransformstageTransformreadonly
Matrix4x4stageLocalToWorldMatrixreadonly
Matrix4x4localToWorldMatrixreadonly
intrenderingLayerMaskreadonly
booldisableStandardAssetsreadonly
boolcanSetPosereadonly
boolisDisposedreadonly

Public Methods:

TypeNameNote
voidRender()Called by LIV SDK
boolSetPose(Vector3 position, Quaternion rotation, float verticalFieldOfView, bool useLocalSpace = false)Called by the developer. Supports only avatars right now. Default space is world space, when using localSpace the space is relative to Stage/StageTransform.
voidDispose()Called by LIV SDK

Changelog

[2.1.1] - 2024-12-09

Fixed

  • Issue with Unity crashing when the LIV App had not been setup.

[2.1.0] - 2024–09-30

Added

  • Updated UI and visual design for LIV component editor.
  • UI toggle enabling override of output alpha with depth buffer.
  • Feature flag to observe enabled/disabled status of LIV avatar.
  • Changelog file to project.
  • Improved error handling for incorrect build targets.
  • Improved handling of service initialization errors.
  • Default LIV settings asset.

Fixed

  • Spam warnings generated from calling a LIV function from OnValidate.
  • Internal bugs.
  • Issue with generation of LIV settings object.
  • Bugs in SDK renderer.

[2.0.2] - 2024-06-18

Fixed

  • Internal bugs.

[2.0.1] - 2024-06-18

Fixed

  • Internal bugs.

[2.0.0] - 2024-11-2024

Added

  • Support for Meta Presence Platform Passthrough, Scene Anchors, Hand Tracking

[1.5.3]

Changed

  • LIV SDK bridge is excluded from non-windows platforms.
  • Moved all strings to editor only to prevent garbage collection.
  • Fixed undefined bridge state handling.
  • Universal render pipeline reporting.
  • Improved code readability and internal behavior.

[1.5.2]

Added

  • canSetPose for detecting if the game can change the pose during runtime.. It can be accessed from liv.render.canSetPose.

[1.5.1]

Added

  • Added universal render pipeline support

Changed

  • Changed approach to extracting alpha information for the foreground layer of LIV; should fix foreground compositing behaviour for most titles, including those on deferred rendering pipelines.
  • Near and far frustum parameters for LIV’s camera are now driven by the game’s HMD camera, and can be manually controlled using LIV.render.cameraInstance.farClipPlane & nearClipPlane
  • Modified SetPose to be world space by default.

Updating from SDKv1.5 to v2.0

If you’ve used the 1.5 SDK and want to upgrade to 2.0 without using any of the new Presence Platform supported features, it’s straight forward.

  1. Backup your project.

  2. Import the LIV 2.0 SDK. If Unity asks for consent for updating the scripts, it’s safe to say Yes.

  3. The serialized properties for the HDM camera and Stage transforms in the LIV component should pick up their old values but it’s good to do a sanity check afterwards.

Overview of the Unreal LIV SDK

What is the Unreal LIV SDK?

The LIV SDK for Unreal Engine is a Mixed Reality (MR) toolset that enables VR developers to blend real-world video with virtual environments. It offers a complete solution for MR capture workflows with adjustable performance settings and integrates with Meta's Presence Platform for advanced features in Unreal Engine 5.4+ through the Meta Fork.

Key Features

Mixed Reality Capture

  • Creates seamless real-time MR capture by blending the player's real-world video with virtual VR environments.
  • Supports two capture workflows:
    • Background-only Capture: Isolates the background layer for compositing.
    • Full Composition: Combines real and virtual elements into a unified view.

Customizable Capture Methods

Choose from three capture methods that balance performance, transparency

Capture MethodPerformanceTransparencyPost-ProcessingUse Case
LivCaptureSingleFastestBest for performance-critical scenarios where transparency and layering are not required.
LivCaptureGlobalClipPlaneNoPostProcessModerateUse for transparent materials when post-processing effects (ex: bloom) are not needed.
LivCaptureGlobalClipPlanePostProcessSlowerUse when full transparency and post-processing effects (ex: reflections, bloom) are required.
LivCaptureBackgroundTransparency (WIP don't use)Moderate✅ (Background)Captures only the background layer with transparency. The player remains excluded.
LivCaptureMulti (WIP don't use)ModerateUse for multi-layer captures where both transparency and post-processing are needed.

Meta Presence Platform Integration (Unreal Engine 5.4+)

When using Unreal Engine 5.4 or later, the LIV SDK connects with Meta's Presence Platform via the Meta Fork to deliver these advanced Mixed Reality features:

  • Passthrough: Seamlessly blend the real environment with virtual content in real-time.
  • Spatial Anchors: Lock virtual objects to specific points in the real world.
  • Scene API: Harness real-world spatial data to create dynamic MR experiences.

Note: Meta Presence Platform features are only available when using the Meta Fork of Unreal Engine, or the Stock Engine + MetaXR plugin.

Device and Platform Compatibility

Supported Unreal Engine Versions

VersionSupported Features
4.26 to 5.4MR capture for Green Screen and immersive workflows.
5.4+ (Meta Fork & Stock Engine + MetaXR plugin)Supports Meta Presence Platform (Passthrough, Anchors).

Platform Requirements

  • DirectX 11: Required for all LIV functionality.
    • Note: DirectX 12 is not supported. Use DirectX 11 via Unreal's Project Settings.
  • Windows OS: Supported for development and deployment.

Hardware Requirements

  • VR Headsets: SteamVR-compatible devices for camera tracking (Oculus Quest, HTC Vive, Valve Index, etc)

What's Included in the LIV SDK?

The LIV SDK includes these essential components for Unreal Engine integration:

  1. Core Plugin Files:
    • LIV.uplugin: Unreal Engine plugin definition file.

    • Source Folder: C++ source code for MR functionality.

    • Content Folder: Essential assets (ex: shaders, configuration files).

      File Explorer

  2. Configuration Tools:
    • Settings for capture methods, and clipping planes. (Ignore “Transparency” option)

    • Compatibility settings for Meta Presence Platform features.

      Plugin Panel

Installing and Configuring LIV SDK

This section provides a detailed, step-by-step guide for downloading, installing, and configuring the LIV SDK in Unreal Engine. By following these instructions, you can successfully integrate the SDK into your VR project, ensuring a smooth development process.

Prerequisites

Before proceeding with installation, confirm the following requirements:

Unreal Engine Versions

  • Supported Versions:
    • Unreal Engine 4.26 to 5.4 for Green Screen and Immersive MR features.
    • Unreal Engine 5.4+ (Meta Fork required) for Meta Presence Platform features.

DirectX

  • Required Version: DirectX 11.

Note: LIV does not support DirectX 12.

Visual Studio

  • Supported Versions:
    • 2019 or 2022 (Required for UE5) for building the project.

How to Get the LIV SDK

The LIV SDK plugin can be obtained from the official LIV website:

Installation Process

Follow these steps to install the LIV plugin in your Unreal Engine project:

Step 1: Extract the Plugin Files

  1. After downloading the SDK, extract the contents of the ZIP file.

  2. Ensure the extracted folder contains the following:

    • LIV.uplugin
    • Subfolders: SourceContent, etc.

    File Explorer

Step 2: Place the Plugin in Your Project

  1. Navigate to the root directory of your Unreal Engine project.

  2. Create a folder named Plugins (if it does not already exist).

  3. Copy the LIV plugin folder into the Plugins directory:

    [YourProjectRoot]/Plugins/LIV

Note: Unreal Engine searches for project-specific plugins in the Plugins folder. Placing the LIV plugin here ensures proper integration with your project.

Step 3: Enable C++ Support

If your project does not already support C++:

  1. Open Unreal Engine

  2. Navigate to Tools > New C++ Class.

  3. Create an empty class to enable the required C++ infrastructure for your project.

    Window Example

Step 4: Generate Visual Studio Project Files

  1. Right-click on the project’s .uproject file.

  2. Select "Generate Visual Studio project files".

    Window Example

Step 5: Build the Project

There are two ways to build the project: using Visual Studio or the Command Line.

Option 1: Build with Visual Studio

  1. Open the .sln file in Visual Studio.

  2. Configure the solution:

    • Solution ConfigurationDevelopment Editor
    • Solution PlatformWin64

    Development Editor

    C:\Users\freya\Documents\GitHub\docs\public\sdk-unreal-v2\step5-1.png

  3. In the Solution Explorer, right-click on the project target (ex: Sandbox) and select Build.

    Development Editor

Option 2: Build Using Command Line

  1. Open a terminal in admin mode.
  2. Use the following command:
    1. Unreal Engine built from Source :

      & "[UnrealEnginePath]\Engine\Build\BatchFiles\Build.bat" -Target="[ProjectTarget] Win64 Development" -Project="[PathToUProject]" -Target="ShaderCompileWorker Win64 Development" -WaitMutex -FromMsBuild -architecture=x64

    2. Unreal Engine from Launcher :

      & "[UnrealEnginePath]\Engine\Build\BatchFiles\Build.bat" -Target="[ProjectTarget] Win64 Development" -Project="[PathToUProject]" -WaitMutex -FromMsBuild -architecture=x64

  3. Replace placeholders as follows:
  • [UnrealEnginePath]: Path to Unreal Engine installation.
  • [ProjectTarget]: Project target name (ex: Sandbox).
  • [PathToUProject]: Full path to the .uproject file.

Note: If you are using a pre-compiled Unreal Engine (Launcher version), omit the ShaderCompileWorker target to avoid errors.

Step 6: Launch the Project

  1. Locate the Unreal Engine executable:
    • Source Build[SourceBuildPath]\Engine\Binaries\Win64\UE5Editor.exe
    • Launcher Version: Use the Epic Games Launcher to open the project.
  2. Open the .uproject file in the editor.

Configuring the LIV Plugin

After installing the plugin, configure it within Unreal Engine:

Step 1: Enable the LIV Plugin

  1. In Unreal Editor, navigate to Edit > Plugins.

  2. Search for "LIV".

  3. Check if the plugin is enabled.

  4. If not, enable and restart the editor when prompted.

    Configuring Plugin

Step 2: Adjust LIV Plugin Settings

  1. Go to Edit > Project Settings.

  2. Scroll to the Plugins > LIV section.

    Configuring Plugin

  3. Configure the following options:

    • Capture Method:

      • Default: ULivCaptureSingle (fastest performance).
      • LivCaptureBackgroundTransparency
      • LivCaptureGlobalClipPlaneNoPostProcess
      • LivCaptureGlobalClipPlanePostProcess
      • LivCaptureMulti

      DConfiguring Plugin

    • Background Only: Enable for simpler MR captures.

    • Transparency: Enable to support translucent objects.

      Configuring Plugin

    • Global Clip Plane: Required for advanced capture methods.

      Configuring Plugin

Step 3: Switch to DirectX 11

  1. Open Edit > Project Settings > Platforms > Windows.
  2. Set the Default RHI to DirectX 11.
  3. Restart the editor to apply changes.

Note: DirectX 12 is not supported yet.

Configuring Plugin

Testing the LIV Plugin

Once installed and configured, test the plugin to ensure functionality:

Step 1: Package the Project

  1. In Unreal Editor, go to File > Package Project > Windows.
  2. Choose a directory for the packaged build.
  3. Package the project.

Configuring Plugin

Step 2: Validate with the LIV App

  1. Download and set up the LIV App:
  2. Launch the LIV App and ensure it detects the packaged .exe file.

Configuring Plugin 3. Test MR output with Mixed Reality Capture Mode.

Meta Fork Specifics

The Meta Fork of Unreal Engine is a customized version of Unreal Engine, created by Meta to support advanced features for the Meta Presence Platform. These features include Passthrough, Scene API, and Spatial Anchors, enabling enhanced VR interactions for Meta Quest devices. This section details how to set up and utilize the Meta Fork, its configurations, and why it is essential for certain features.

Overview of Meta Fork

What is the Meta Fork?

The Meta Fork is a modified Unreal Engine build that integrates optimizations and features specific to Meta Quest devices. It allows developers to:

  • Access the Meta Presence Platform.
  • Use advanced features like PassthroughScene API, and Spatial Anchors.
  • Optimize performance for Meta Quest and future Meta VR hardware. Meta Fork

When to Use the Meta Fork

  • Presence Platform Features: If your project requires Passthrough, Scene API, or Spatial Anchors.
  • Meta-Specific Optimization: If you’re targeting Meta Quest devices for optimal performance.
  • Unreal Engine Version: If you are using Unreal 5.4+.

Available Configurations

SetupDescriptionUse Case
Stock Unreal EngineOfficial Unreal Engine from Epic Games Launcher or source builds.Standard VR projects.
Stock Engine with Meta XR PluginAdds basic Meta XR functionality without Meta-specific optimizations.Limited support for Meta features.
Meta ForkCustom Unreal Engine version enabling Presence Platform features.Required for advanced Meta capabilities.

Why Use the Meta Fork?

The Meta Fork is essential for accessing the Meta Presence Platform features. These features enhance your VR applications by enabling the following:

Key Features

  1. Passthrough:
    • Leverages Meta Quest’s cameras to blend real-world visuals with the virtual environment.
    • Perfect for augmented reality (AR) or mixed reality (MR) applications.
  2. Scene API:
    • Allows for detailed spatial understanding of the physical environment.
    • Enables object placement and interactions based on real-world geometry.
  3. Spatial Anchors:
    • Provides persistent world anchors for objects in the VR/AR space.
    • Ensures objects maintain their position across sessions.

How to Set Up the Meta Fork

The Meta fork of Epic’s Unreal Engine will give you the most up to date integration of Oculus features. However, you must build the editor from its source. To use the Meta Fork, follow these steps:

Step 1: Download the Meta Fork

  1. Follow the instructions on Accessing Unreal Engine source code on GitHub to obtain:
    • an Epic account
    • a GitHub account
    • authorization to access the Unreal Engine source repositor
  2. Download the Meta Fork:

Step 2: Build the Meta Fork from Source

Once you have downloaded the Meta Fork source code, you need to build it:

Install Prerequisites

  • Git: Required for source code version control.
  • Visual Studio 2022 with the following workloads:
    • Desktop Development with C++
    • Game Development with C++
  • DirectX End-User Runtime: Install the latest DirectX runtime.

Clone the Repository

  1. Open a terminal or Git client.

  2. Clone the repository using the command provided in the Meta Developer Portal:

    git clone https://github.com/Meta/unreal-engine-fork.git

Run Setup Script

  1. Navigate to the cloned repository directory.
  2. Run the Setup.bat to download dependencies and set up the required files for the engine. Meta Fork

Generate Project Files

  1. Run the GenerateProjectFiles.bat to generate Visual Studio project files.

Meta Fork

Build the Engine

  1. Open the generated .sln file in Visual Studio.

Meta Fork

  1. Build the engine in Development Editor mode:

    • Solution ConfigurationDevelopment Editor
    • Solution PlatformWin64

    Meta Fork

  2. Wait for the build process to complete. This may take some time.

Step 3: Launch the Meta Fork Editor

Once the build is complete, launch the editor:

  1. Locate the executable:

    [MetaForkPath]/Engine/Binaries/Win64/UE5Editor.exe

  2. Double-click to open the Meta Fork Editor.

Integrating the LIV SDK with Meta Fork

After building and launching the Meta Fork, integrate the LIV SDK using the steps in the Installing and Configuring the LIV SDK section.

Testing LIV with Meta Presence Platform Features

Testing Passthrough

  1. Enable Passthrough in the project:

    • Open Project Settings.
    • Navigate to Plugins > Meta XR.
    • Enable Passthrough and configure its settings.

    Meta Fork

  2. Test in VR Preview mode to ensure Passthrough functionality is working.

Testing Scene API

  1. Enable the Scene API:

    • Go to Project Settings > Meta XR.
    • Enable Scene Support and configure the necessary settings.

    Meta Fork

  2. Use sample code from Meta’s documentation to validate Scene API functionality.

Testing Spatial Anchors

  1. Enable Spatial Anchors:
    • Open Project Settings.
    • Navigate to Plugins > Meta XR.
    • Enable Anchors Support.
    Meta Fork
  2. Test by saving and loading anchors across sessions.

Frequently Asked Questions

Q: Do I need the Meta Fork if I’m not using Presence Platform features?

A: No, you can use the stock Unreal Engine with the LIV SDK for standard MR features. The Meta Fork is required only for Meta-specific features like Passthrough, Scene API, and Spatial Anchors.

Q: Can I install the Meta Fork alongside the stock Unreal Engine?

A: Yes, the Meta Fork can coexist with the stock Unreal Engine. You can maintain separate installations for different projects.

Q: How do I ensure compatibility with the LIV SDK?

A: Use Unreal Engine 5.4+ (Meta Fork) and configure the project settings as described in the Installing and Configuring the LIV SDK

Integration Testing

Integration testing is critical to ensure that the LIV SDK works seamlessly within your Unreal Engine project. This section provides detailed instructions for verifying the SDK’s functionality, testing Mixed Reality (MR) features, and validating compatibility with both the stock Unreal Engine and the Meta Fork.

Why Integration Testing is Important

Integration testing ensures:

  • The LIV SDK is correctly installed and configured.
  • Mixed Reality capture works as expected in both editor and packaged builds.
  • Advanced features like transparency, global clipping planes, and Meta Presence Platform functionality are fully operational.
  • Performance and compatibility meet project requirements.

Preparation for Testing

Before beginning integration testing, ensure the following:

Prerequisites

  1. LIV SDK Installed:
  2. Meta Fork (Optional):
    • If using Meta-specific features, ensure the Meta Fork is installed and configured (see Meta Fork Specifics).
  3. Hardware Setup:
    • Connect a SteamVR-compatible devices (Oculus Quest, HTC Vive, Valve Index, etc)
  4. Packaging Configuration:
    • Ensure the project is set up for Windows 64-bit builds and uses DirectX 11 (mandatory for LIV).

Testing in the Editor

Step 1: Enable VR Preview

  1. Launch your project in Unreal Editor.
  2. Open the VR Preview mode:
    • Go to Play > VR Preview in the toolbar.
    Integration Testing
  3. Verify that:
    • The LIV plugin is active.
    • Your VR headset is correctly tracked and rendering.

Step 2: Test MR Settings

  1. Navigate to Edit > Project Settings > Plugins > LIV.
  2. Adjust the following settings to test different MR features:
    • Capture Method:

      • Test the different capture methods :
        • ULivCaptureSingle
        • LivCaptureBackgroundTransparency
        • LivCaptureGlobalClipPlaneNoPostProcess
        • LivCaptureGlobalClipPlanePostProcess
        • LivCaptureMulti
    • Transparency:

      • Enable transparency and test with translucent materials in the scene.

      Integration Testing

    • Background Only:

      • Toggle the background-only setting to verify its behavior.

      Integration Testing

Step 3: Test Meta Presence Platform Features

(If using the Meta Fork)

  1. Enable PassthroughScene API, and Spatial Anchors in Project Settings > Meta XR.

  2. Use sample scripts from Meta’s documentation to validate these features in the editor.

    Integration Testing

Testing in Packaged Builds

Testing in a packaged build is crucial as the LIV SDK’s MR functionality is primarily validated in fully packaged applications.

Step 1: Package the Project

  1. Open your Unreal Engine project.

  2. Go to File > Package Project > Windows.

  3. Choose an output directory for the packaged build.

  4. Verify that:

    • The build configuration is set to Development or Shipping.
    • The Default RHI is set to DirectX 11 in Project Settings > Platforms > Windows.

    Integration Testing

Step 2: Test with the LIV App

  1. Download the LIV App:

  2. Launch the Packaged Build:

    • Run the .exe file generated during packaging.

    Integration Testing

  3. Open the LIV App:

    • Start the LIV App and verify it detects your packaged application.

    Integration Testing

  4. Test MR Output:

    • Select Mixed Reality Capture mode in the LIV App.
    • Validate the MR output in both automatic and manual launch modes:
      • Automatic: The LIV App detects the game automatically.
      • Manual: Manually select the .exe file in the LIV App.

Step 3: Validate Transparency and Global Clip Planes

  1. Ensure the following are active in your build:
    • Transparency:
      • Verify translucent objects render correctly in the MR output.
    • Global Clip Plane:
      • Test scenes with clipping planes and ensure objects are composited properly.

Performance Testing

Testing the performance of MR capture ensures the LIV SDK operates smoothly without compromising the VR experience.

Step 1: Monitor Frame Rates

  1. Use the Unreal Engine Stat Unit and Stat FPS commands to monitor frame rates.
  2. Ensure that enabling MR capture does not cause significant performance degradation.

Step 2: Test on Target Hardware

  1. Deploy the packaged build to a system with your target VR headset.
  2. Validate that performance remains consistent across different hardware setups.

Tips for Successful Testing

  1. Use Command-Line Logs:
    • Launch the packaged application with the log flag to view detailed runtime logs.

      "[GamePath]\MyGame.exe" -log

  2. Simplify the Test Scene:
    • Use a minimal scene for initial testing to isolate MR capture issues.
  3. Verify Engine Settings:
    • Double-check all relevant settings in Project Settings, especially under Plugins > LIV and Platforms > Windows.

Tips And Configurations

Advanced Configuration

Advanced configurations allow you to customize LIV SDK behavior to fit your project’s unique requirements. These configurations optimize capture methods, enable advanced rendering features, and address specific use cases like transparency and global clipping planes.

Capture Methods

The LIV SDK offers multiple capture methods to balance performance, transparency support, and post-processing effects. Selecting the correct method depends on the requirements of your project.

Capture MethodSpeedTransparencyPost-ProcessingUse Case
LivCaptureSingleFastestBest for performance-critical scenarios where transparency and layering are not required.
LivCaptureGlobalClipPlaneNoPostProcessModerateUse for transparent materials when post-processing effects (ex: bloom) are not needed.
LivCaptureGlobalClipPlanePostProcessSlowerUse when full transparency and post-processing effects (ex: reflections, bloom) are required.
LivCaptureBackgroundTransparency (WIP don't use)Moderate✅ (Background)Captures only the background layer with transparency. The player remains excluded.
LivCaptureMulti (WIP don't use)ModerateUse for multi-layer captures where both transparency and post-processing are needed.

How to Configure:

  1. Go to Edit > Project Settings > Plugins > LIV.
  2. Select the method appropriate to your project requirements:
    • Use LivCaptureSingle for maximum performance.
    • Use LivCaptureGlobalClipPlaneNoPostProcess or LivCaptureGlobalClipPlanePostProcessfor transparency.

Enable Transparency

Context: Transparency is crucial for rendering translucent objects like glass, holograms, and effects. To display transparency correctly, specific capture methods and material settings must be configured.

Steps to Enable Transparency:

  1. Use one of these supported capture methods:
    • LivCaptureGlobalClipPlaneNoPostProcess
    • LivCaptureGlobalClipPlanePostProcess

Common Issues - Transparency Not Rendering:

  • Ensure the material Blend Mode is set to Translucent (see Material Configuration).
  • Confirm that Global Clip Plane is enabled.

Global Clip Plane

Context

The Global Clip Plane is essential for splitting the MR capture into separate layers (foreground, background, player). Without it, occlusion will fail, and players or objects may render incorrectly above everything else.

Steps to Enable Global Clip Plane:

  1. Navigate to Edit > Project Settings > Engine > Rendering > Reflections.

  2. Enable Support Global Clip Plane.

    Meta Fork

  3. Restart the editor to apply the settings.

Use Case - Required for:

  • LivCaptureGlobalClipPlaneNoPostProcess
  • LivCaptureGlobalClipPlanePostProcess
  • Scenes with foreground transparency requiring correct occlusion.

Material Configuration for Additive Transparency

Context: Materials using Additive Blend Mode skip depth testing, causing them to always render in front of other objects. This disrupts occlusion and breaks MR layering in LIV.

Steps to Fix Additive Materials:

  1. Open the Material Editor for the problematic object.
  2. In the Details Panel:
    • Change Blend Mode to Translucent.
    • Uncheck Disable Depth Test.
  3. Adjust material properties:
    • Use Opacity to control translucency.
    • Add Emissive Color for glowing effects without additive blending.

What This Fix Does: Ensures the material interacts with the depth buffer, allowing LIV to render it properly with correct occlusion.

Fixing the Permutation Error Bug on Packaged build

Context

The Permutation Error occurs when Unreal Engine fails to load the LIV plugin due to an issue with the EngineVersion field in the LIV.uplugin file. This happens when switching between the stock Unreal Engine and the Meta Fork.

  • Scenario 1: Stock Unreal Engine

    If the error occurs in the stock engine, the issue is caused by the presence of the EngineVersion field.

    Fix:

    1. Navigate to the LIV plugin file:

      [YourProjectRoot]/Plugins/LIV/LIV.uplugin

    2. Open LIV.uplugin in a text editor.

    3. Remove the EngineVersion line:

      "EngineVersion": "X.X.X"

    4. Save the file and restart Unreal Engine.

  • Scenario 2: Meta Fork

    If the error occurs in the Meta Fork, the issue is caused by the absence of the EngineVersion field, or a non-exact matching EngineVersion.

    Fix:

    1. Navigate to the LIV plugin file:

      [YourProjectRoot]/Plugins/LIV/LIV.uplugin

    2. Open LIV.uplugin in a text editor.

    3. Add the correct EngineVersion line. Replace "X.X.X" with the exact Meta Fork version you are using.

      "EngineVersion": "5.4.3"

    4. Save the file and restart Unreal Engine. Summary

Engine TypeIssueSolution
Stock EngineEngineVersion field exists.Remove the "EngineVersion" line in LIV.uplugin.
Meta ForkEngineVersion field is missing.Add the "EngineVersion": "X.X.X" line with the exact version.

Meta Features (Optional)

For projects using the Meta Fork and Presence Platform:

  1. Enable PassthroughScene API, and Spatial Anchors in Plugins > Meta XR.
  2. Configure the Scene API to interact with the real-world environment.
  3. Test Spatial Anchors for persistent object placement across sessions.

Meta XR Integration

The Meta XR Plugin enables advanced features such as Passthrough, Scene API, and Spatial Anchors using the Stock Unreal Engine. Requirements

  • Meta XR Plugin Version: Minimum 65.0.

  • Unreal Engine Version5.3.2 or higher.

  • Location: The Meta XR Plugin must be placed in the Marketplace (or Fab) directory of the Unreal Engine installation.

    Meta Fork

Steps to Integrate the Meta XR Plugin

1. Locate or Create the Marketplace Directory The Meta XR Plugin must reside in the engine's Marketplace folder.

  • Navigate to your Unreal Engine installation directory: [UnrealEnginePath]/Engine/Plugins/Marketplace/
  • If the Marketplace folder does not exist, create it manually.

2. Install the Meta XR Plugin

  • Download the Meta XR Plugin (Version 65.0 or higher) from the Meta Developer Portal.
  • Extract the plugin files.
  • Place the extracted plugin folder (MetaXR) into the Marketplace directory: [UnrealEnginePath]/Engine/Plugins/Marketplace/MetaXR/

3. Enable the Meta XR Plugin in Unreal Engine

  • Open Unreal Engine.
  • Go to Edit > Plugins.
  • Search for Meta XR and enable the following plugins:
    • MetaXR: For advanced Presence Platform features.
    • OculusXR: Core integration for Meta VR devices.
  • Restart the Unreal Editor to apply the changes.

4. Configure Meta XR Features

  • Open Edit > Project Settings > Meta XR.
  • Enable the features you need:
    • Passthrough: Allows real-world visuals to blend with MR content.

      Meta Fork

    • Scene API: Detects and interacts with real-world geometry.

      Meta Fork

    • Spatial Anchors: Supports persistent placement of virtual objects.

      Meta Fork

Common Issues with Meta XR Integration

IssueCauseSolution
Meta XR Plugin Not Detected / Oculus XR missingPlugin not placed in the correct directory.Ensure it is located in [UnrealEnginePath]/Engine/Plugins/Marketplace/MetaXR.
Passthrough Not WorkingPlugin not enabled or VR headset compatibility issue.Enable Meta XR features in Project Settings > Meta XR.

FAQ and Tips

This section addresses common issues and provides practical tips to optimize your LIV SDK experience.

Common Issues and Solutions

IssueCauseSolution
LIV Plugin Not DetectedPlugin folder is misplaced or not enabled.Ensure the plugin is in the correct Plugins folder and is enabled in the Unreal Editor.
Transparency Not WorkingIncorrect capture method or material settings.Use LivCaptureGlobalClipPlaneNoPostProcess or PostProcess and set material to Translucent.
DirectX 12 ErrorsDirectX 12 is not supported.Switch to DirectX 11 in Project Settings > Platforms > Windows > Default RHI.
Player Renders Above EverythingGlobal Clip Plane is disabled.Enable Support Global Clip Plane in Project Settings > Rendering > Reflections.
Additive Materials Always on TopAdditive blend mode skips depth testing.Open the Material Editor, switch Blend Mode to Translucent, and uncheck Disable Depth Test.
Performance Drops in MR OutputHigh rendering load (translucent materials, effects).Optimize materials, reduce translucency usage, and monitor performance with Stat Unit.
Meta Fork Features Not WorkingIncorrect Meta Fork setup or build process.Ensure the Meta Fork is downloaded, built correctly, and configured in Unreal Engine.

Tips for a Smooth Workflow

Switch to DirectX 11

  • The LIV SDK does not support DirectX 12.
  • Go to Edit > Project Settings > Platforms > Windows and set Default RHI to DirectX 11.

Optimize Scene Performance

  1. Minimize the use of translucent materials.
  2. Avoid overloading the scene with dynamic lighting and complex shaders.
  3. Use Stat Unit and Stat FPS commands to monitor performance.

Enable Logs for Debugging

  • Run your packaged build with the log flag to view detailed logs:

    "[GamePath]\MyGame.exe" -log

Package Builds Correctly

  1. Use Development or Shipping configuration when packaging.
  2. Ensure the build is targeted for Windows 64-bit.

Test on Target Hardware

  • Always test your project on the VR hardware it is intended for to identify any compatibility or performance issues early.

Monitor Logs for Issues:

  • Run builds with the log flag to identify and resolve rendering errors.

Advanced Troubleshooting

Performance Bug (UE-86191) Unreal Engine may exhibit a performance bug when using MR capture with certain configurations. To fix this:

  1. Open the DefaultEngine.ini file in your project directory.

  2. Add the following lines:

    [/Script/Engine.RendererSettings] r.SceneRenderTargetResizeMethod=2 r.SceneRenderTargetResizeMethodForceOverride=True

Command-Line Packaging

  • If packaging fails in the editor, use the command line:

    & "[UnrealEnginePath]\Engine\Build\BatchFiles\RunUAT.bat" BuildCookRun -project="[PathToUProject]" -platform=Win64 -clientconfig=Development -serverconfig=Development -cook -build -stage -pak -archive -archivedirectory="[OutputFolder]"

Changelog

Version 2.0.0

Release Date: 10-01-2025

New Features

  • Added support for Unreal Engine 5.4+ with Meta Fork integration for Meta Presence Platform features (Passthrough, Scene API, Spatial Anchors).

Enhancements

  • N/A

Bug Fixes

  • N/A

Known issue

  • N/A

SDK Compatibility

  • Unreal Engine Versions:
    • Supported Versions:
      • Unreal Engine 4.26 to 5.4 for Green Screen and Immersive MR features.
      • Unreal Engine 5.4+ (Meta Fork required) for Meta Presence Platform features.
  • Hardware: SteamVR-Compatible headsets
  • Other Dependencies:
    • DirectX 11,
    • Meta Fork (for Presence Platform features on SDK 5.4+)

Additional Resources

Official Documentation

  • LIV App Configuration Guide: LIV App Setup Guide

    Step-by-step instructions for setting up and using the LIV App for MR capture.

  • Meta Presence Platform Documentation: Meta Developer Portal

    Reference material for Meta-specific features such as Passthrough, Spatial Anchors, and Scene API.

  • Unreal Engine Documentation: Unreal Engine Docs

    General Unreal Engine guides for project configuration, materials, and plugins.

Community and Support

  • LIV App help guide: Help docs Guides for using the LIV App on Steam

  • LIV Discord Community: LIV Discord

    Join the LIV Discord server to connect with other developers, ask questions, and get support.

  • LIV YouTube Tutorials: LIV YouTube Channel

    Watch setup tutorials, troubleshooting guides, and MR capture demonstrations.

  • LIV Support Ticket System: LIV Support Portal

    Submit a ticket for technical support or report issues with the SDK.

  • Meta Developer Forums: Meta Forums

    Discuss Meta Presence Platform features and troubleshooting with Meta developers and engineers.

  • Unreal Engine Community Hub: Unreal Engine Forums

    Explore Unreal Engine forums, Q&A threads, and community resources.

Troubleshooting Tools

  • Unreal Engine Logs:

    Find engine logs to diagnose errors and warnings in your Unreal project.

    • Location: [ProjectRoot]/Saved/Logs/
  • ADB Logs for Quest Devices:

    Use ADB (Android Debug Bridge) to access logs for Meta Quest devices:

    • adb logcat
  • Performance Monitoring:

    Use Unreal Engine commands to monitor performance in real-time:

    • Stat FPS: Displays frame rate.
    • Stat Unit: Shows frame time, GPU time, and CPU time.

Contact Information

If you need direct assistance or technical support, reach out to the LIV SDK team:

LIV SDK Integration Testing

Congrats on adding the LIV SDK to your game, now to verify if everything is working correctly. Testing is the same whether using Unity or Unreal.

Pre-requisites;

  • Ensure you have a Steam Compatible VR headset connected to your PC and SteamVR is running
  • You have the LIV App on Steam downloaded and installed
  • You have the LIV SteamVR driver installed. Guide for more details.
  • If you’re testing MRC, you have the appropriate equipment and a mixed camera profile set up in LIV. A guide on how to do that can be found on our help docs.
  • Although not necessary, the SteamVR app OVR Advanced Settings helps make the testing process easier

If you’re using a Quest device and doing mixed reality capture, it’s important to not recenter the playspace or have your device go to sleep after you have calibrated. Recentering will change your coordinates and your calibration alignment won’t be accurate anymore.

Testing LIV - Basic Mixed Reality

  1. If using a Meta headset, ensure the runtime in SteamVR is set to SteamVR, not OpenXR (How to set SteamVR as your OpenXR runtime)

  2. Make sure the game is playable before running with LIV. This step establishes a baseline that any impacts to the game could potentially be due to LIV and the LIV SteamVR Driver.

  3. Start LIV & make sure LIV Output is running

Select Mixed Reality Capture, Start PCVR Mixed Reality Capture. Starting the capture will launch 2 windows; the compositor LIV Output window & the LIV Settings window

Start capture from LIV APP

Select Camera -> Add (green camera with + sign) -> In the Type drop down menu select Video camera -> In the device drop down menu select your camera device here -> In the Resolution drop down menu select the resolution your camera is set to Note: If you are using Nvidia Broadcast make sure to scroll down and use ARGB -> Save

Quest link app

Run OBS capturing the LIV Output using game capture and also capture SteamVR VR View using game capture. We do this to record the output as an audit/history of changes.

Quest link app

  1. Start game, once with Auto and another with Manual

Sync & Launch via the Auto tab in LIV Select the game in the drop down menu and select Sync & Launch. LIV does its best to automatically detect supported launched games on Steam and populate the dropdown. Quest link app

Try launching the game separately, and manually target the game.exe with LIV through the “Manual” tab

Quest link app

  1. Verify if any in-game options are present as some games have added controls to enable LIV.

Any launch issues (special options required, desktop window issues) - Help Guide Check menu options for graphics quality and mixed reality specific settings

  1. Mixed Reality Capture checks

Viewing the compositor window LIV Output with Default Compositing effect selected, check objects and any in game UI for correct foreground behavior. Correct behavior will show the person in front or behind game objects, depending on the angles. Using OVR Advanced Settings to change angles is helpful at this point.

Quest link app

Check again in LIV’s dump + composite mode Effect mode for proper behavior. Dump + Composite mode shows the individual layers that make up the composition.

Quest link app

Check various angles by rotating play space with OVR Advanced Settings using the Rotate Space slider in the Offsets tab

Quest link app

Check Fake Lighting modes in LIV.

Quest link app Quest link app

Check that the FoV override features behaves accurately

Quest link app

Calibration check, ensuring the virtual and real controllers are aligned and the latency of controllers are minimal.

Check live re-calibrations Do a quick bad calibration and see if it takes, you will be able to quickly tell by checking calibration in the LIV Output window.

Measure performance impact with fpsVR log

Testing LIV - Quest Presence Platform

Set up Quest, SteamVR, and LIV. The latest steps and information can be found on our help desk guide. This process will change as we make improvements. It’s also best to test with a static camera rather than a dynamic camera, just for the reason it’s not as involved to set up. The differences between the static camera and dynamic camera would be due to tracking inconsistencies with the LIV App rather than SDK integration.

If your are testing Passthrough:

  1. In LIV, on the Capture -> Manual page ensure that Effect is Dump + Presence Platform
  2. In LIV, on the Output that Hide Background is enabled

Top Left: Foreground RGB

Top Right: Alpha If “Hide background” is enabled

Foreground alpha (pink) & Background alpha (blue)

Bottom Left: Background RGB

Bottom Right: Composite

Quest Presence Platform

What to look for, in addition to all the criteria covered in Basic Mixed Reality testing.

  • With Hide background enabled, all the elements in your game that you’ve specified to be hidden in Passthrough mode are black in the foreground, background, and Alpha quadrants.
  • In the bottom right composite, you’ll see the real life camera feed with the foreground. The background will not be visible in the composite.
  • If you’re testing with a default avatar camera, you should see the green LIV avatar being obstructed as different game objects go in front of the player. Vice versa, the default LIV avatar will block background objects.
  • For real cameras, LIV does not have a live segmentation (background removal) at this time. It’s best to use a green screen and go through calibration.

When verifying other Presence Platform capabilities like hand tracking, scene and anchors it is not necessary to use Dump + Presence Platform and enabling Hide background.

  • You may use the dump + composite
  • With hand tracking, you should verify that the virtual hands and avatar hands are lined up and the composite reflects in-headset movements
  • With scene and anchors, you should be seeing the composite respecting the anchors and scene you’ve set up with your game play

Testing LIV - Avatars and Virtual Camera

  • Switch to Avatar Capture mode Help Guide
  • Check controller/tracker behavior, making sure controllers/trackers (if using) are behaving properly. We want to see the avatar in LIV reflect the real life movements.
  • Check the in-headset UI, making sure you are able to use the LIV avatar menu in headset Help Guide
  • Check if an in-game avatar - if present. If in game avatar is present check for settings to disable it in the game settings menu
  • If you’ve implemented a game driven LIV camera (eg. Eye of the Temple, Vail, Blaston), enable ‘Use Game Camera’ in the options Open the menu -> Select Avatar -> Game Settings menu will be on the left Disable the custom game camera for games that use a custom camera in avatar mode, uncheck "Use Game Camera" while in the avatar UI

Avatars and Virtual Camera

Launching your app with LIV support

Once you’ve finished integrating and testing, we can add your game to our officially supported games on liv.tv/games. Content creators are always looking for new games to record and make content with and listing your game here will help it get discovered.

  1. Reach out to us at hi@liv.tv letting us know your game has been released with the LIV SDK. Please provide a thumbnail image, release dates, and links to your store pages on Quest or Steam.
  2. We’ll review the game and verify everything works before adding it to the list. We’ll confirm with you once the game has been added.
  3. If you’re interested, you can also coordinate marketing with LIV to promote integration and reach our community of content creators.

LIV App API

This section of our documentation refers to the LIV App, available on Steam.

The LIV App currently has four published API surfaces:

  • Avatar Camera Plugins, used to animate and control LIV avatar cameras.
  • URI Scheme Commands, used to automate LIV's startup and management from code.
  • Registry, used to locate a LIV install or register external applications that support LIV.
  • Command Line, used to list all installed & supported LIV applications on the current PC.

All currently available APIs work for PCVR (aka, SteamVR) only.

We are working on better surfaces to interact with LIV from code, and want to provide as much control as possible - if you have a use-case not covered by our existing APIs, please reach out to on our Discord and let us know! We have a lot in the works, and the more we learn early, the better the results will be.

What are URI Scheme Commands?

Long story short, they are URLs that are invokable as "shell commands" in Windows. As long as LIV is installed, and has been run once on a system, these commands will work when called from anywhere. Some commands will automatically start LIV, and boot LIV Capture. Some commands won't do anything if LIV is not already running and active.

You can call them manually, using the Windows "Run" prompt (Win+R). You may also create shortcuts to these commands using Windows Explorer: New -> Shortcut, then enter your command. You can then create a hotkey for that shortcut by modifying its properties.

Behind the scenes, LIV registers itself as a URI Scheme handler for the liv-app "protocol". When Windows is asked to execute a URI as a shell command, it will look for a registered handler, and then start that program. When LIV is already running, a second instance of LIV is loaded - it then sends the command to the first instance of LIV before closing itself. Naturally, this process takes some time. We don't recommend using this interface for high-frequency control of LIV.

AutoHotkey Example

Run liv.app://...

URI Commands - Cameras

These commands interact with LIV Capture for PCVR. These commands will not automatically launch LIV Capture if LIV is not already running.

liv-app://camera/set/<INDEX>

EG. liv-app://camera/set/2

Changes the currently active camera in LIV. The index is the number of the camera in the camera list, starting from 0. If you provide a camera index that is "out of bounds", the command will be ignored. You may re-order cameras in LIV by modifying the configuration file in %localappdata%\LIV\App - modify the CompositorBasic.CameraProfiles array.

liv-app://camera/set/fovOverride/<NUMBER>

EG. liv-app://camera/set/fovOverride/43.5

Sets the current camera's FoV override value. Set the FoV to 0 to clear the override. Has no effect on avatar cameras; see avatar camera plugins.

liv-app://camera/add/fovOverride/<NUMBER>

EG. liv-app://camera/add/fovOverride/-1.5

Adds to the current camera's FoV override value. If no override is set, it will use the camera's native FoV, then add to it as the override. Has no effect on avatar cameras; see avatar camera plugins.

liv-app://camera/toggle/freeze

If you are using LIV with a tracked camera (IE. You have a SteamVR tracker attached to a camera) and you are not moving it, you can temporarily freeze it in place. This command toggles the camera's frozen state.

URI Commands - Controlling LIV

All of the below commands will launch LIV if it is not running, then execute the command.

liv-app://launch/compositor

Starts PCVR Capture if not already running.

liv-app://launch/streamerkit

Starts LIV StreamerKit.

liv-app://focus/app

Brings LIV into the foreground.

liv-app://capture/manual/pid/<PROCESS ID>

EG. liv-app://capture/manual/pid/1337

Starts PCVR Capture if not already running, then switches to manual capture mode and attempts to capture the process ID given.

liv-app://launch/steam/<STEAM APPID>

EG. liv-app://launch/steam/1098100

Starts PCVR Capture if not already running, then switches to auto capture mode and launches the Steam game provided. Will not launch Steam games that are not detected by LIV. See the command line documentation for how to get a list of installed LIV games. Once the game is loaded, LIV will automatically begin capturing it.

liv-app://launch/viveport/<VIVEPORT GAME ID>

EG. liv-app://launch/viveport/8fd7deb0-64d8-48b1-bd44-87db84f37de8

Starts PCVR Capture if not already running, then switches to auto capture mode and launches the Viveport game provided. Will not launch Viveport games that are not detected by LIV. See the command line documentation for how to get a list of installed LIV games. Once the game is loaded, LIV will automatically begin capturing it.

Avatar Camera Plugins

Avatar camera plugins are currently managed through our community Discord, please join it and ask for access to the template project in the #camera-plugin-chat channel!

You will be able to publish plugins to the #camera-plugin-releases channel.

Avatar camera plugins are C# projects that compile a library that interfaces with LIV's Unity-based avatar renderer. You may control LIV's camera, or modify a user's avatar or scene.

Registry

LIV uses the registry to store a few helpful paths for locating and interacting with a LIV installation.

All registry keys are stored under the 64-bit Current User hive, in the location:

HKEY_CURRENT_USER\SOFTWARE\LIV.App

Stored here are the following keys:

KeyTypePurpose
BaseDirectoryStringPath to LIV's main directory.
ExecutableStringPath to LIV's main executable.
SDKRuntimePathStringPath to the LIV SDK's runtime directory.
ExternalApplicationsSub-keyA list of external applications compatible with LIV.

They are updated whenever LIV is opened. You can use the BaseDirectory path along with LIV.App.CommandLine.exe for easy access to the command-line API!

ExternalApplications

If you've integrated the LIV SDK, but are not distributing through Steam, Meta Quest App Store, NetVios, or Viveport, you may add an entry to this sub-key and LIV will attempt to detect, launch, and automatically capture your app.

The format for these entries is described below, in JSON - this directly translates to the structure in the registry.

"ExternalApplications": {

  // An opaque string identifier for your application.
  "custom-app-id": {

    // User-visible name.
    "Name": "My Custom Application",

    // The app's install folder. Used to detect game engine & SDK version.
    "InstallPath": "C:\Path\To\App",

    "Executable": "C:\Path\To\App\Executable.exe",
    "Arguments": "-your -options -here",
    "WorkingDirectory": "C:\Path\To\App" // Optional.
  }
}

Screenshot of regedit.exe showing the values described above.

It is best practice, if you are adding your application to this list, to proactively update the values stored in the registry whenever your application is installed, run, or uninstalled.

If LIV cannot find the executable, or install path, it will not be added to LIV's capture list. Additionally, if LIV cannot find the LIV SDK in the install path, it will not be added.

Changes to the registry are not live. You need to restart LIV for any changes to apply.

Command Line

You can find LIV's command line interface in the install folder, which you can navigate to by going through your Steam Library: Steam > Library > LIV > Properties > Local Files > Browse Local Files... The executable is named LIV.App.CommandLine.exe.

All usable commands are documented in the executable itself, so refer to that for detailed and current documentation: .\LIV.App.CommandLine.exe help .\LIV.App.CommandLine.exe verb --help

version

EG. .\LIV.App.CommandLine.exe version

Outputs the current LIV Command Line version.

list-apps

EG. .\LIV.App.CommandLine.exe list-apps --human-readable EG. .\LIV.App.CommandLine.exe list-apps --help

Lists all installed and supported LIV titles on the PC. You may filter for a minimum support level (No SDK, SDK, or SDKv1.5). Refer to the command line documentation for more details.