Plugin Installation
From Source

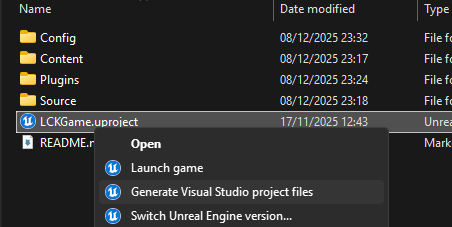
Generate Visual Studio project files
- Generate Visual Studio project files
Required Plugins
LCK
Required - Core recording functionality including encoding and capture
LCKAudio
Required - Audio source interface and mixing
Optional Plugins
UI & Interface
UI & Interface
- LCKUI - 3D UI component library
- LCKTablet - Complete virtual tablet interface
Audio Sources
Audio Sources
- LCKUnrealAudio - Unreal Engine native audio
- LCKOboe - Android low-latency microphone
Audio Middleware (External Dependencies)
Audio Middleware (External Dependencies)
These plugins require you to download and install third-party plugins:
- LCKFMOD - FMOD Studio integration (requires FMODStudio plugin)
- LCKWwise - Audiokinetic Wwise integration (requires Wwise plugin)
- LCKVivox - Vivox voice chat capture (requires VivoxCore plugin)
Enabling Audio Middleware Plugins
Download the required plugin
- FMOD: Download FMODStudio plugin for Unreal Engine
- Wwise: Download Wwise plugin for Unreal Engine
- Vivox: Download VivoxCore plugin for Unreal Engine
Module Dependencies
Add the required modules to your.Build.cs file:
Platform Configuration
- Windows
- Android
- Linux
Windows Setup
No additional configuration required. The SDK uses Windows Media Foundation for encoding.Requirements:- Windows 10 or later
- DirectX 11 compatible GPU
- AVCodecsCore plugin enabled
Project Settings
Navigate to Project Settings > Plugins > LCK SDK:| Setting | Type | Description |
|---|---|---|
Tracking ID | String | UUID v4 identifier for analytics (required) |
Game Name | String | Your application’s display name (required) |
Profile_SD | Struct | 1280x720 quality preset |
Profile_HD | Struct | 1920x1080 quality preset |
Profile_2K | Struct | 2560x1440 quality preset |
Profile_4K | Struct | 3840x2160 quality preset |
Quality Profile Settings
Each profile contains:Verification
After installation, verify the SDK is working:Troubleshooting
Plugin not found
Plugin not found
- Verify plugin is in the correct
Plugins/directory - Regenerate project files (right-click .uproject > Generate Project Files)
- Check Output Log for loading errors
Module not found in Build.cs
Module not found in Build.cs
- Ensure the plugin is enabled in
.uprojectfile - Verify module name spelling matches exactly
- Check for circular dependencies
Android build fails
Android build fails
- Verify Vulkan is enabled
- Check NDK version compatibility
- Ensure permissions are added to manifest