Skip to main contentAdd your In-game Camera SDK in a few short steps.
Quickstart
Step 1: Configure LCK Settings
- Open the LCKGame project following installation guidelines
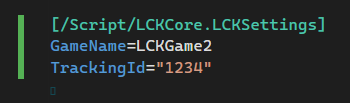
- Enter your Tracking ID in DefaultGame.ini (obtained from the LCK Dashboard after account creation).
- The GameName will be used to identify the filepath videos and photos are saved.
 Step 2: Add the Tablet to Your Level
- Locate the tablet Blueprint at Plugins/LCKTabletContent/Blueprints/BP_LCKTablet.
- Drag BP_LCKTablet into your level.
- (Optional) Adjust default recording settings in the BP_LCKTablet blueprint:
- Recording Profiles (SD, HD, 2K, 4K)
The tablet is fully functional out-of-the-box with collision-based interaction, for tablet Grabbing, look at the dedicated section.
Step 3: Test Recording
- Package and deploy to your Quest headset (or run in editor for PC testing).
- In-game:
- Grab the tablet by its handles.
- Tap the Record button to start/stop recording.
- Use the quality button to cycle betweenSD/HD/2K/4K.
- Use the orientation button to toggle Landscape/Portrait.
- Recorded videos are saved to:
- Quest: /Movies/GameName
- PC: /Videos/GameName
- Recorded photos are saved to:
- Quest: /Pictures/GameName
- PC: /Pictures/GameName
Next Steps
- Customize recording profiles in the BP_LCKTablet Details panel.
- Explore the full UI system (camera modes, mic toggle, etc.).
Copy the LCK and LCKUnrealAudio plugins in the Plugins folder of the project.
Open Unreal and make sure the plugins are enabled, they should be by default.
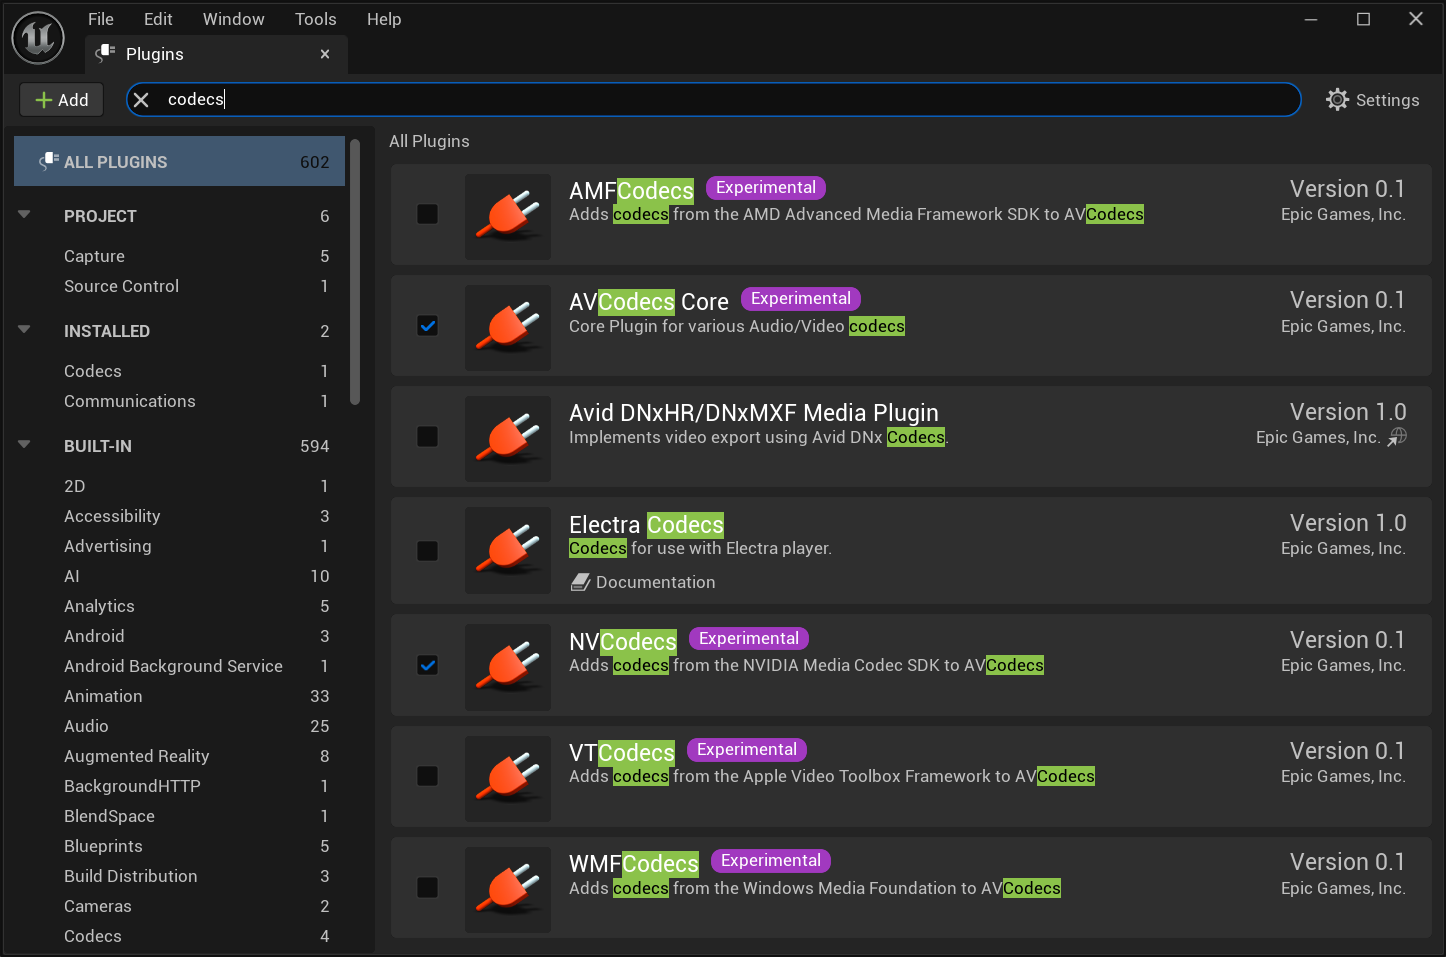
To enable recording on Windows you will also need to enable the AVCodecsCore plugin (which should be enabled via dependency when you add LCK) and also add the relevant extension plugins like NVCodecs and AMFCodecs. Unfortunately as for now WMFCodecs only supports audio so it’s not a full Windows Media Foundation extension.
 Let’s start setting up our new amazing camera

 You will need a SceneCaptureComponent2D which is the minimum requirement but you may also want to add a timer and a viewfinder for preview.
The minimal requirement to start recording are the following nodes that can be accessed from the LCKRecorderSubsystem
You will need a SceneCaptureComponent2D which is the minimum requirement but you may also want to add a timer and a viewfinder for preview.
The minimal requirement to start recording are the following nodes that can be accessed from the LCKRecorderSubsystem
 SetupRecorder: setup the recording settings like resolution and samplerate. Samplerate should match the audio setup and for this version it needs to be 48kHz because Unreal only supports this on Android for microphone capture.
Type “samplerate” in Project Settings and make sure it’s set to 48000 for Android.
SetupRecorder: setup the recording settings like resolution and samplerate. Samplerate should match the audio setup and for this version it needs to be 48kHz because Unreal only supports this on Android for microphone capture.
Type “samplerate” in Project Settings and make sure it’s set to 48000 for Android.
 The second parameter for this node is the SceneCaptureComponent2D that we want to use as the actual source for the recording.
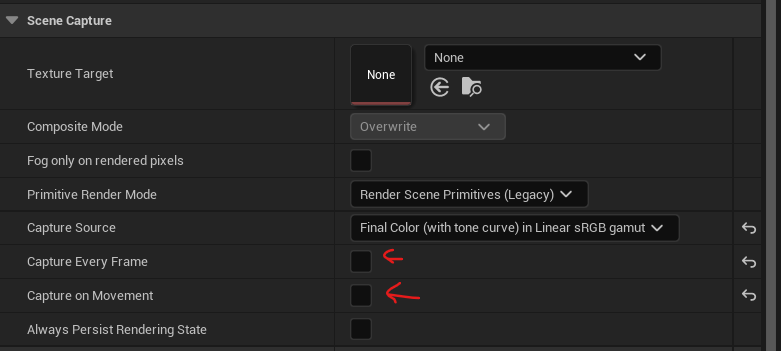
 Make sure the SceneCaptureComponent is not active when the recording is not needed. We don’t capture Every Frame anyway but we use the target framerate in RecorderParams
 StartPreview: this is an optional node and it allows the viewfinder to be activated before starting the actual recording process. It’s useful in conjunction with the RenderTarget node that can be requested once the preview is started.

 The RenderTarget can be used as a texture in the viewfinder component.
StartRecording: once everything has been set up we can start the recording process. Make sure to check the returned value to validate if the recording has actually started successfully.
The RenderTarget can be used as a texture in the viewfinder component.
StartRecording: once everything has been set up we can start the recording process. Make sure to check the returned value to validate if the recording has actually started successfully.
 GetTime: now you can get the recording time in seconds and breaking it down in minutes and seconds like this
 And show it to the player for a visual hint that the recording is working.
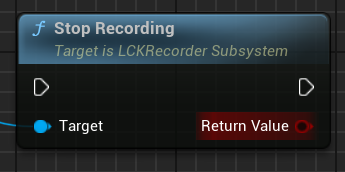
StopRecording: when we are done we can stop the recording and the file will be saved in the gallery. This operation might take long depending on the length of the video (hence the size of the file to be copied to the gallery). You may also validate the return value to make sure everything went well.
And show it to the player for a visual hint that the recording is working.
StopRecording: when we are done we can stop the recording and the file will be saved in the gallery. This operation might take long depending on the length of the video (hence the size of the file to be copied to the gallery). You may also validate the return value to make sure everything went well.
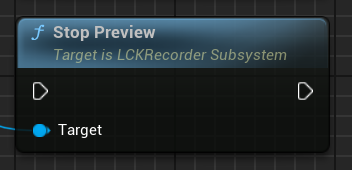
 StopPreview: you can finally decide if you want to stop the preview so the camera stops rendering and save performance and battery life when not needed.